Videos
Introducing Custom Name Digitizing from Blue Bunny Hollow — personalized embroidery lettering for your projects! Each name is manually digitized for smooth stitching and professional results. Choose from a variety of stitched fonts, with or without knockdown stitching for textured fabrics. Details at https://bluebunnyhollow.com/featured
If you are on any of the embroidery Facebook groups, you will see this question come up a lot. Why are there missing stitches in my embroidery design? Here is a video that will explain what is happening and how to fix it.
Create perfectly straight quilting lines and even stitches on your quilted projects.
Do you need help with sewing perfect corners for your embroidered projects? You have done a great job with your embroideries and sewing the project. But…the corners make it look homemade…and you want it to have the perfection of handmade. Check out this video on how to make the perfect corner for your sewing projects.
Welcome to my tutorial on achieving perfect placement embroidery. Whether you're a beginner or an experienced embroiderer, proper placement is key to creating stunning designs. Knowing your desired placement, the right tools and this tutorial, you'll achieve flawless placement embroidery every time...let's get started.
Step by step instructions on how to embroider the neckline of a t-shirt.
How to use bluebunnyhollow.com's Continuous Line Quilting embroidery designs. Step by Step instructions. Embroidery designs available at https://bluebunnyhollow.com/quilting-and-more
Learn how to use stretcher frames with your embroideries for wall art.
How to embroider on the fur of the Santa hat.
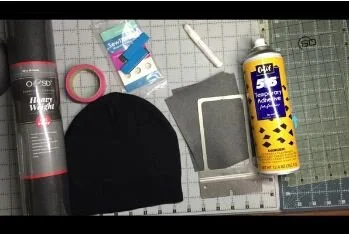
A knockdown stitch (called a Fluffle Patch at bluebunnyhollow.com) in embroidery is a technique used to create a smooth and even surface on fabrics with a textured or raised background. It involves stitching a layer of thread or stitches over the area to be embroidered, usually in a back-and-forth pattern, to flatten the fabric and create a stable foundation for the subsequent embroidery design. The knockdown stitch ensures that the embroidered design stands out prominently and prevents the textured background from interfering with the clarity and precision of the final embroidery work.
How to make an envelope.
How to make embroidered greeting cards Style 2.
How to embroider bluebunnyhollow Ready to Embroider Coasters and Rope coasters that you make.
How to make embroidered postcards.
How to make embroidered greeting cards Style 1.
How to embroider and create the rope frame around the quilted embroidery.
Good binding techniques are crucial for quilts and table runners as they provide the finishing touch and ensure the longevity and durability of the project. Binding serves to encase the raw edges of the quilt or table runner, preventing fraying and wear over time. A well-executed binding not only enhances the overall appearance but also adds structural integrity to the edges, keeping the layers securely together. It provides a clean, professional finish and helps maintain the quilt or table runner's shape, allowing it to withstand frequent use, washing, and handling. Properly applied binding ensures that your quilts and table runners will be enjoyed and cherished for years to come. I prefer a 1/2" binding on my quilts, table runners, etc. This video shows how I do my 1/2" binding and then stitching the back down with a blind hem.
Sometimes we make mistakes when we embroider…
I have had this set of rulers for many years...one of my favorites for getting my projects done quickly! As I mention in the video, they no longer make them, however, I tell you where you can find them. They are definitely worth having.


